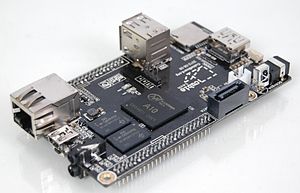
Reviving old Cubieboard single board computer with FreeBSD
Adventure of trying out a real UNIX, the hard way

Reviving an old Cubieboard single board computer with FreeBSD
TLDR: Write FreeBSD installation image for Cubieboard into SD card. Connect USB-TTL/UART adapter to UART pins in the board. Set serial speed in your serial port terminal emulator program to 115200 bit/s. Boot the board and login with username root, password root. Rest is just normal FreeBSD administration which is actually documented in their website. Basic GPIO works with gpioctl.
Longer story. Getting into console.
As a very long time Linux user, I have never really played with any of the good old BSDs, so I finally decided to try out some of them. However, just installing them in a Virtualbox would be too easy and boring…
I also just found one of my old single board computers from around 2012-2013, Cubieboard (1). It has an Allwinner A10 processor, 1GiB memory, even 4GB NAND flash. Hmm, I wonder if combining these would be possible…
Well, it turned out that FreeBSD (still) supports this board, OpenBSD and NetBSD not so much. Good. So, I downloaded SD card image of FreeBSD 12.0-RELEASE from https://www.freebsd.org/where.html and wrote it to a spare microSD card.
Connected the board to an HDMI display and booted. Display wakes up and shows UBoot booting and what I then interpreted as FreeBSD kernel doing something. Great. But it then just ended with line like “relocation_offset 0”. No login prompt, which I had expected based on using various Linuxes in various SBCs.
Well, crap, did it not work? During my quite short research I had not found any handholding installation instructions about these SBC images. I just followed the path that similar Linux installations use. Then I noticed that Ethernet port blinking lights in the board looked like it might be active.
Oh, network scan revealed that the board has gotten an IP address from DHCP and responds to ping. So, the board has booted and is alive. But no SSH service (or any other). How am I supposed to access this?
Quick and impatient googling did not reveal any tricks, like with Rasbian way of creating some magic file into boot partition of the SD card. Also my Linux PC does not seem to understand FreeBSD filesystem in the card. So no editing of boot scripts.
Then another sharp observation about the board. It has clearly marked UART pins in the middle. Maybe the console is lurking there. And hopefully the UART is 5v tolerant, since I connected that to my old USB-TTL/UART adapter connected to my PC. Speed setting in my serial port terminal emulator program (my choice is picocom) to 9600. Got garbage. Another try with 115200 bits/s.
Success, I got the login prompt! But what username/password? Like a great hacker, I tried root with no password. Incorrect. then root/root. It worked, I am in! (later note: there seems to be also a preconfigured user freebsd with password freebsd)
Playing around
Setting up and using FreeBSD is quite similar than Linux. I did not event attempt to configure graphical user interface with this old board, probably it would not even be possible. But networking works and I managed to set up Nginx web server and simple nodejs application. Got multicast DNS (*.local name) working too using mDNSResponder.
First thing to get working was enabling ssh-server. Then creating a new user, and put it into group wheel.
Searching and installing binary packages with pkg is pretty much the same as with apt/yum/pacman in various linuxes.
One thing I did not immediately manage to get working: correct time at boot. I tried to setup NTP, but it did not seem to
actually set the time. Then I added ntpdate_enable to rc.conf and after it the whole machine did not appear in network.
I needed to add ntpdate -b 0.freebsd.pool.ntp.org to cron (@reboot), which is bit icky.
GPIO & other HW
One thing this old board might be usable is hardware control. It seems to have almost 100 pins. But how to use them?
Luckily May/June 2019 edition of FreeBSD Journal includes article “Introduction to Hardware Hacking on FreeBSD” which helped me to implement the “HelloWorld of hardware” i.e. blinking a LED. I could not be bothered to wire LED into actual pins, but googling revealed that board has two programmable LEDS (blue and green), and they are named PH20 and PH21.
And dmesg revealed that this version of FreeBSD does indeed have GPIO support.
gpioc0: <GPIO controller> on gpio0
gpioc1: <GPIO controller> on axp2xx_pmu0
gpioled0: <GPIO LEDs> on ofwbus0
gpioctl -lv then includes among 174 pins:
pin 145:        0       PH20<OUT>, caps:<IN,OUT,PU,PD>
pin 146:        0       PH21<OUT>, caps:<IN,OUT,PU,PD>
Great, lets GPIO: gpioctl 145 1 turns green led on, gpioctl 145 0 off. gpioctl -t 145 toggles it.
There was also this gpioled0 device… And there are device files like /dev/led/cubieboard:blue:usr. So lets try
echo 1 > /dev/led/cubieboard:blue:usr. Yep, blue led turned on.
Dmesg also included something about iic (I2C) controllers and man page of gpioctl mentions gpioiic(4), but that is not installed. Perhaps I look into that later. No mention of SPI bus anywhere…